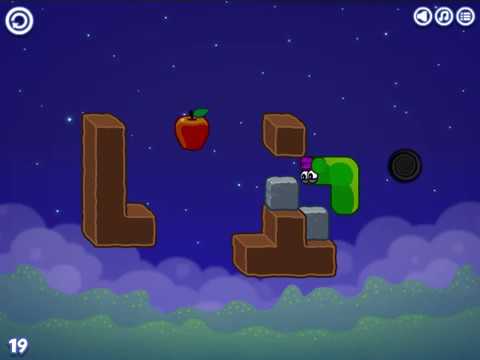
Apple Worm Level 19 Walkthrough
Apple Worm Level 19 is a short route with a strict setup: you use the apple to reach the right-side earth block, take a controlled drop, then reposition so you can stack stones and move right to the exit. If your screen doesn’t match the key frames early, fix it before you start stacking.
Video Walkthrough (Click to Play)
Need another level? Apple Worm All Levels Guide
Quick Navigation (Video ↔ Steps)
For Apple Worm Level 19, the two fastest checkpoints are Step 2 (the natural drop landing) and Step 5 (the stacked stones shape). If your screen doesn’t match those frames, Step 6 usually feels blocked even if the earlier steps were “close.”
When you watch the video, pause at the moments that match Step 2 (landing), Step 3 (target position after pushing the lower stone), and Step 5 (the stack). Treat each pause as a pass/fail check before continuing.
Step-by-Step Guide
Follow the quick steps first, then use the key frames to confirm your landing (Step 2) and your stack shape (Step 5).
Quick Steps
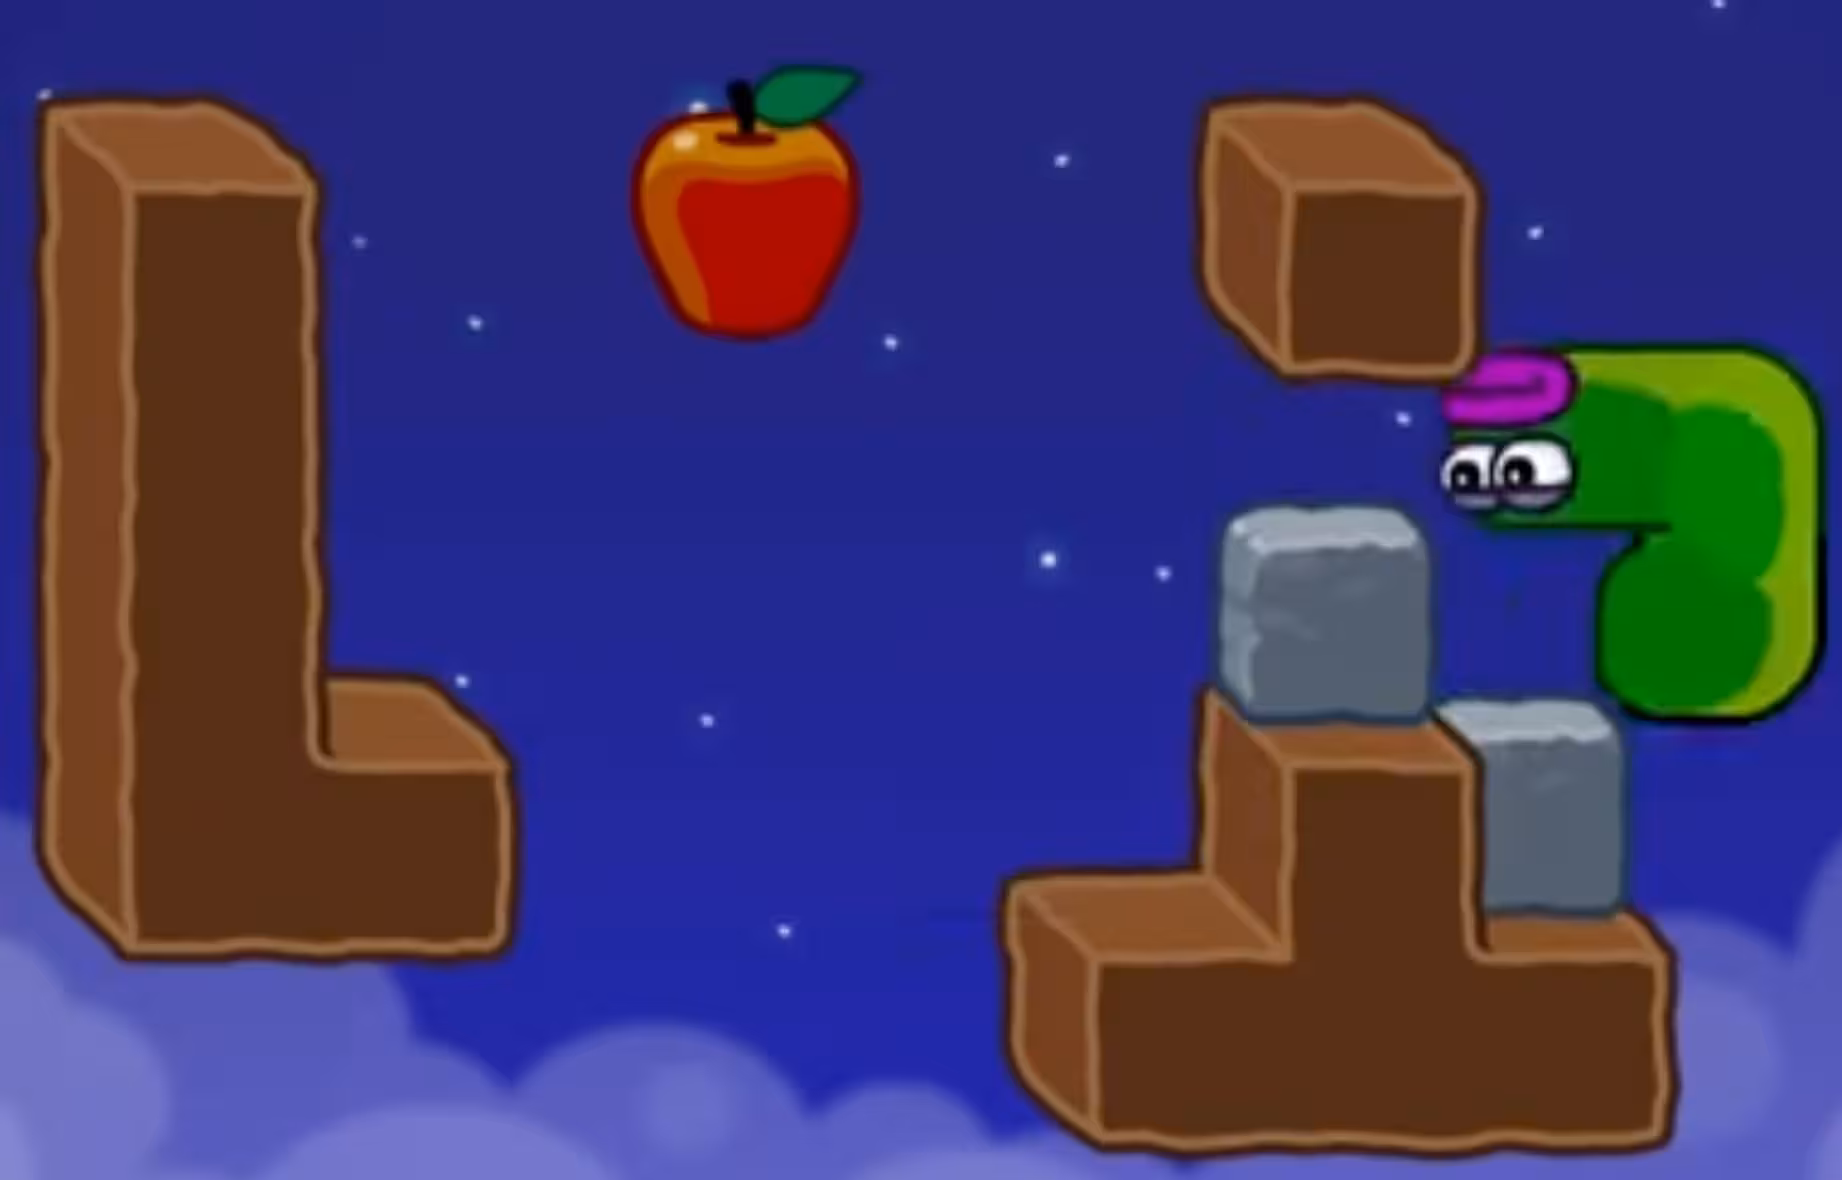
- Use the apple to move the worm onto the right-side earth block.
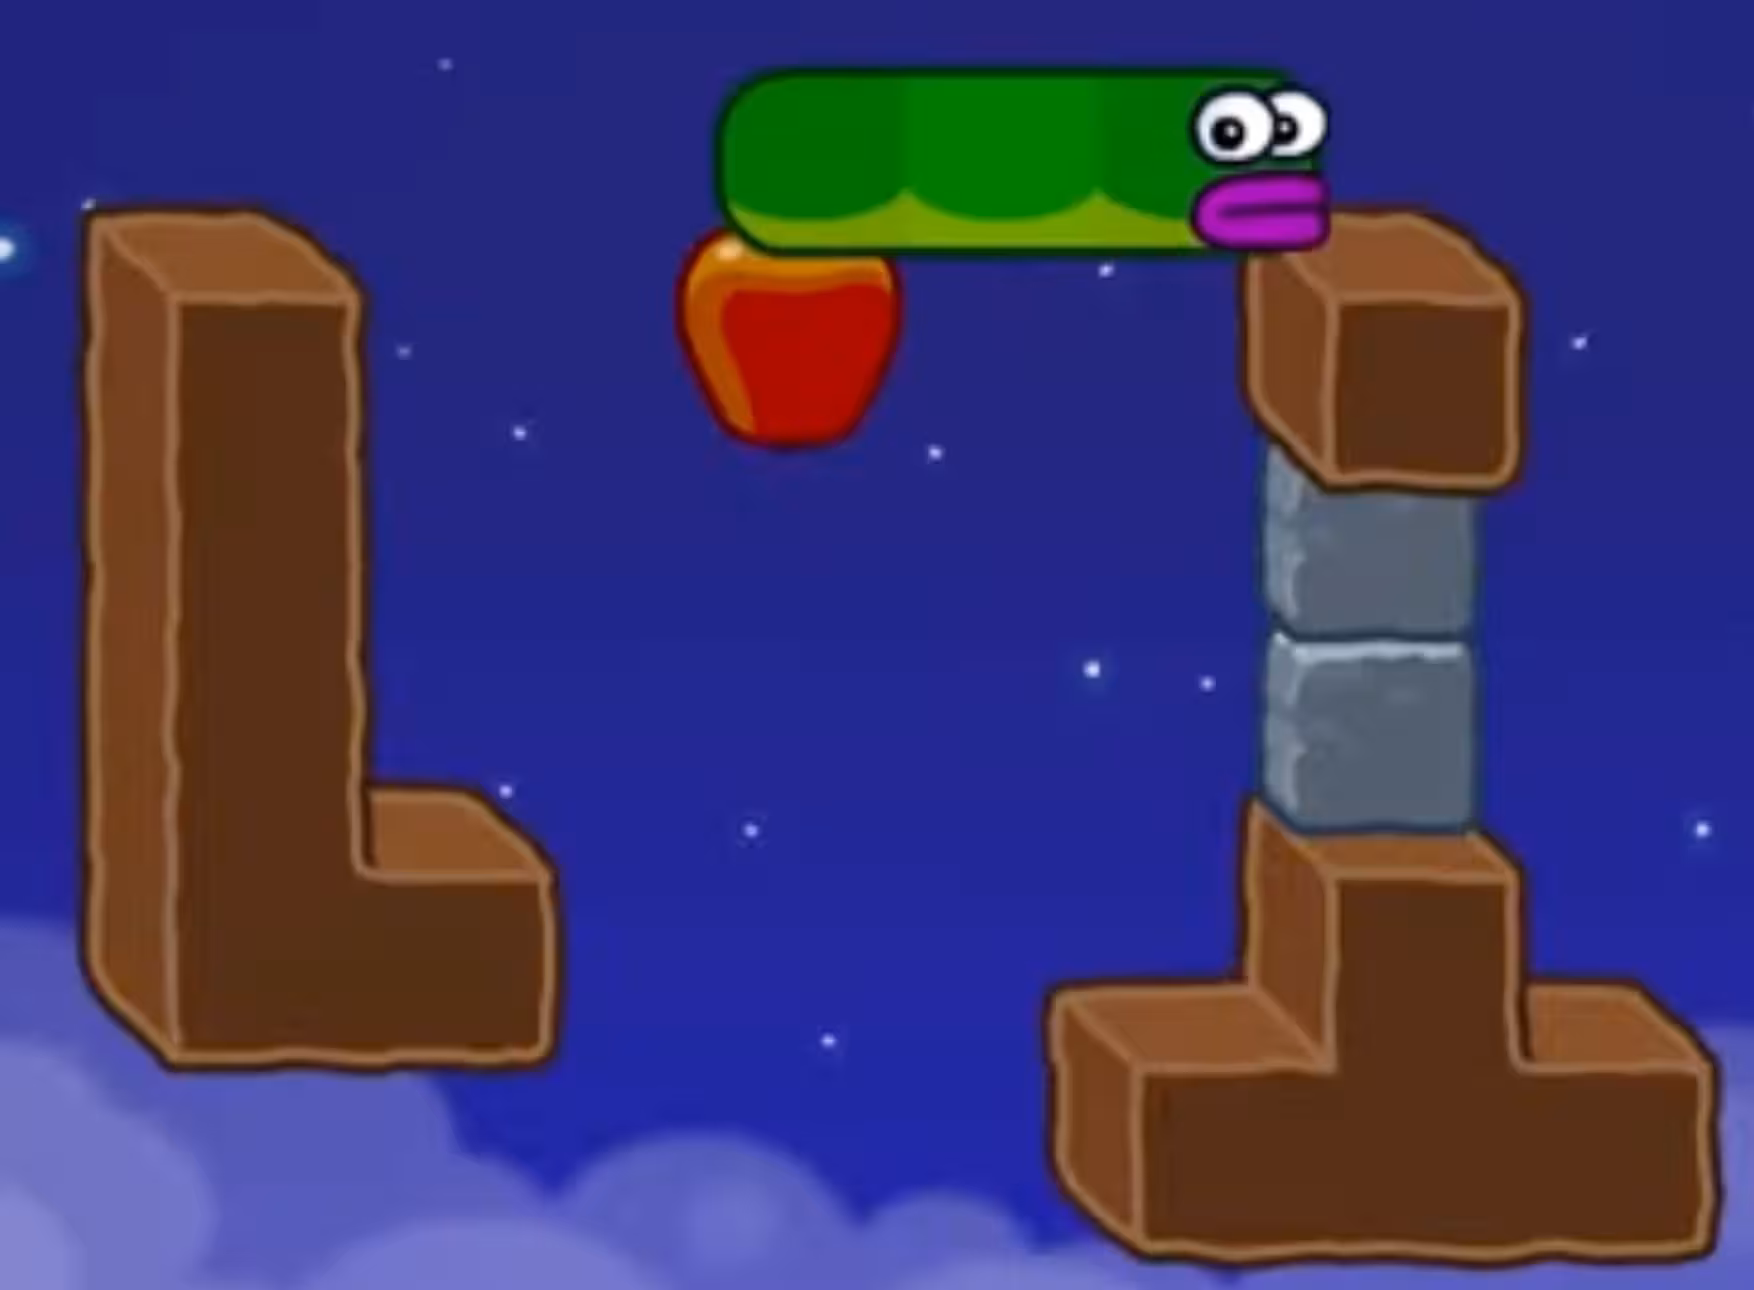
- Move the worm up one step and let it drop naturally.
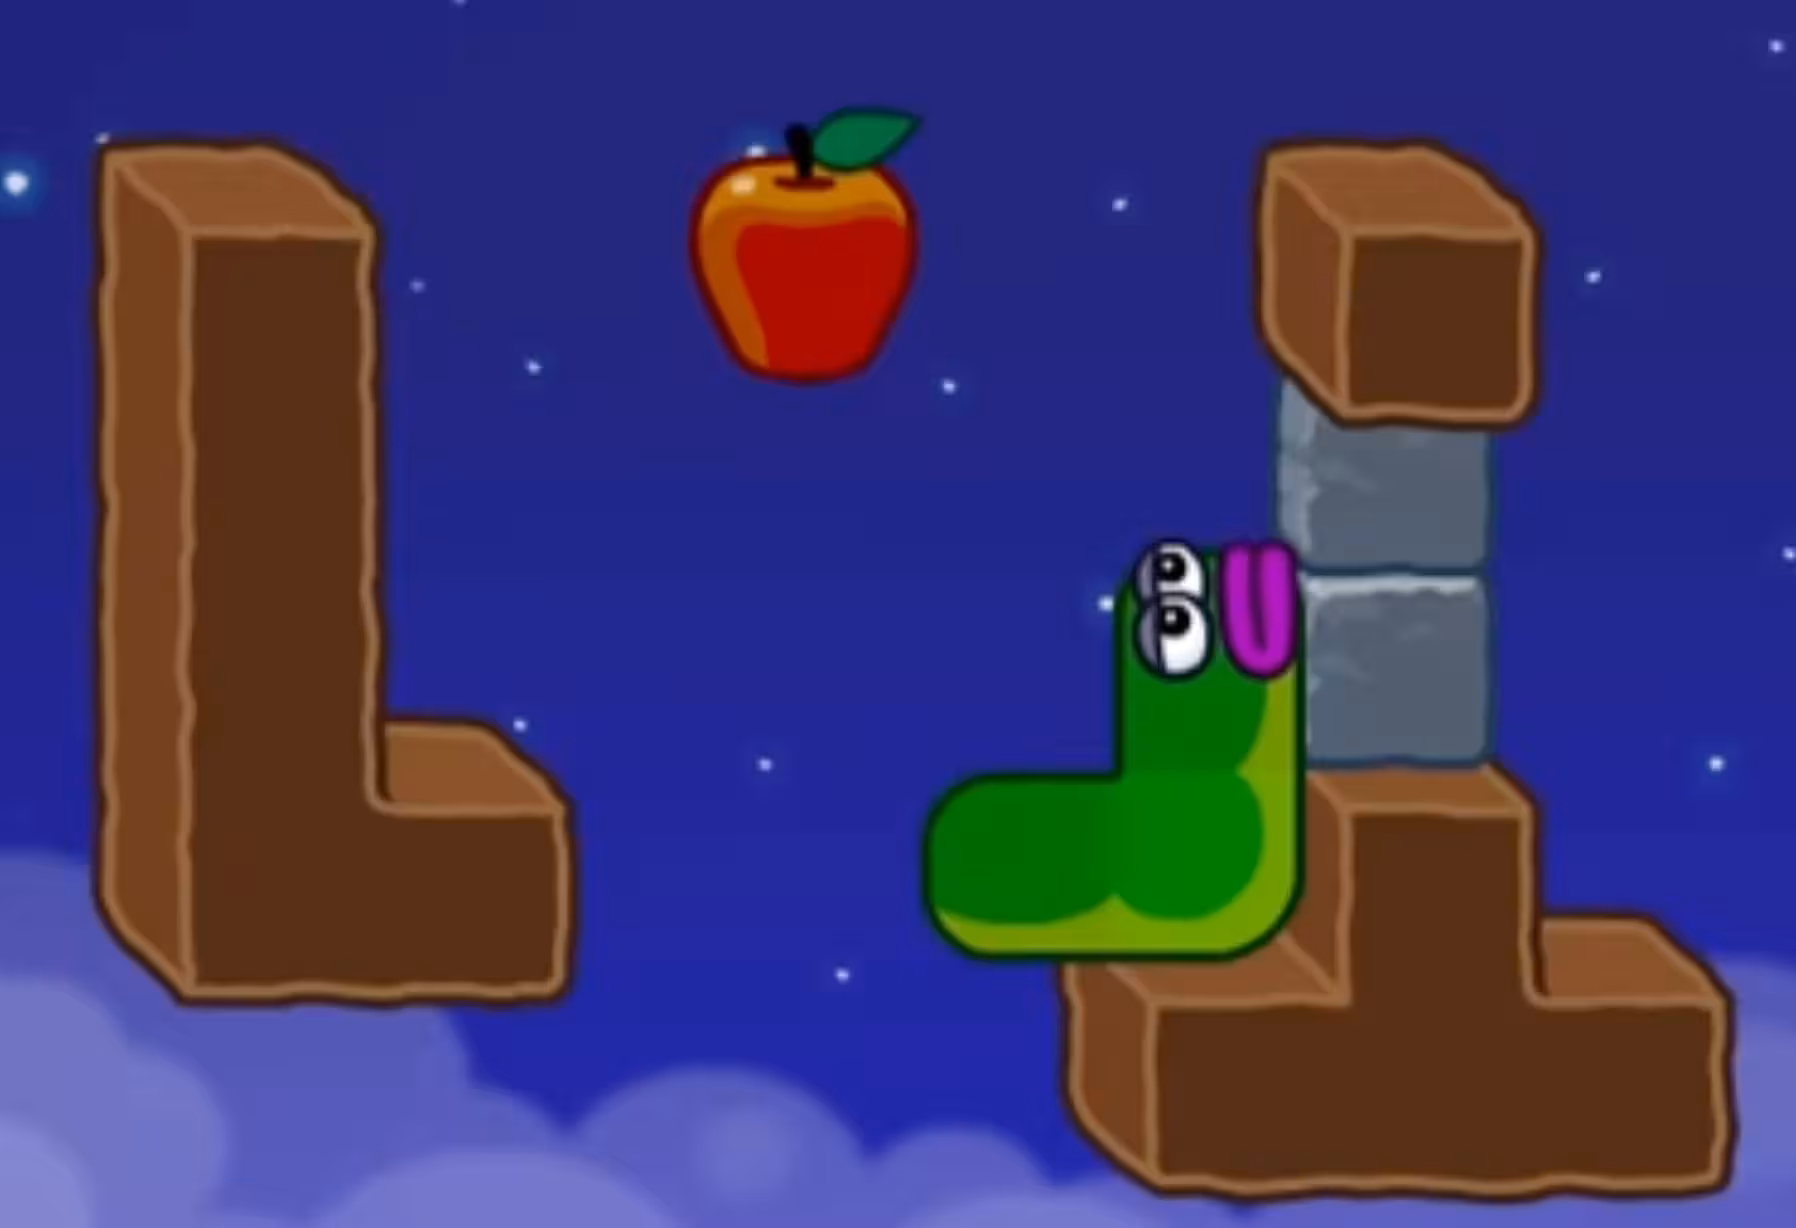
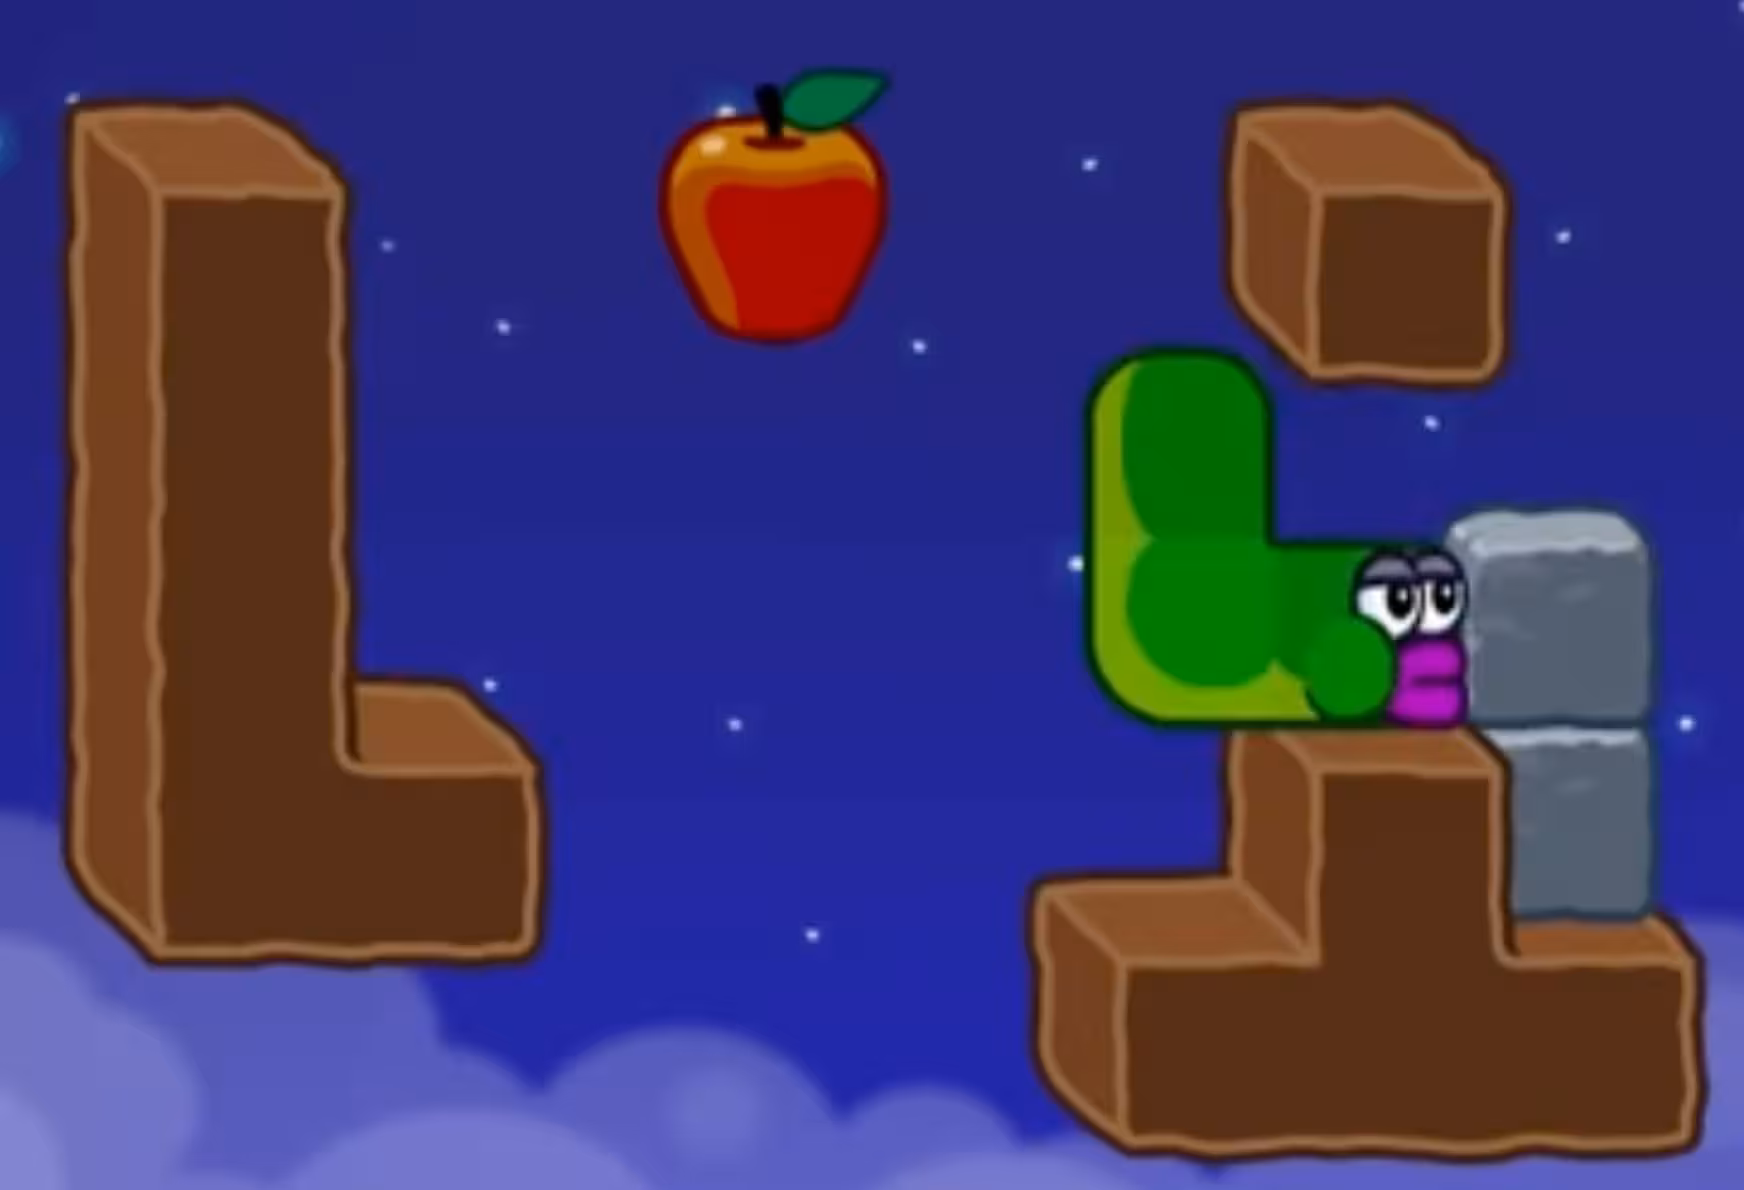
- Push the lower stone block to reach the target position.
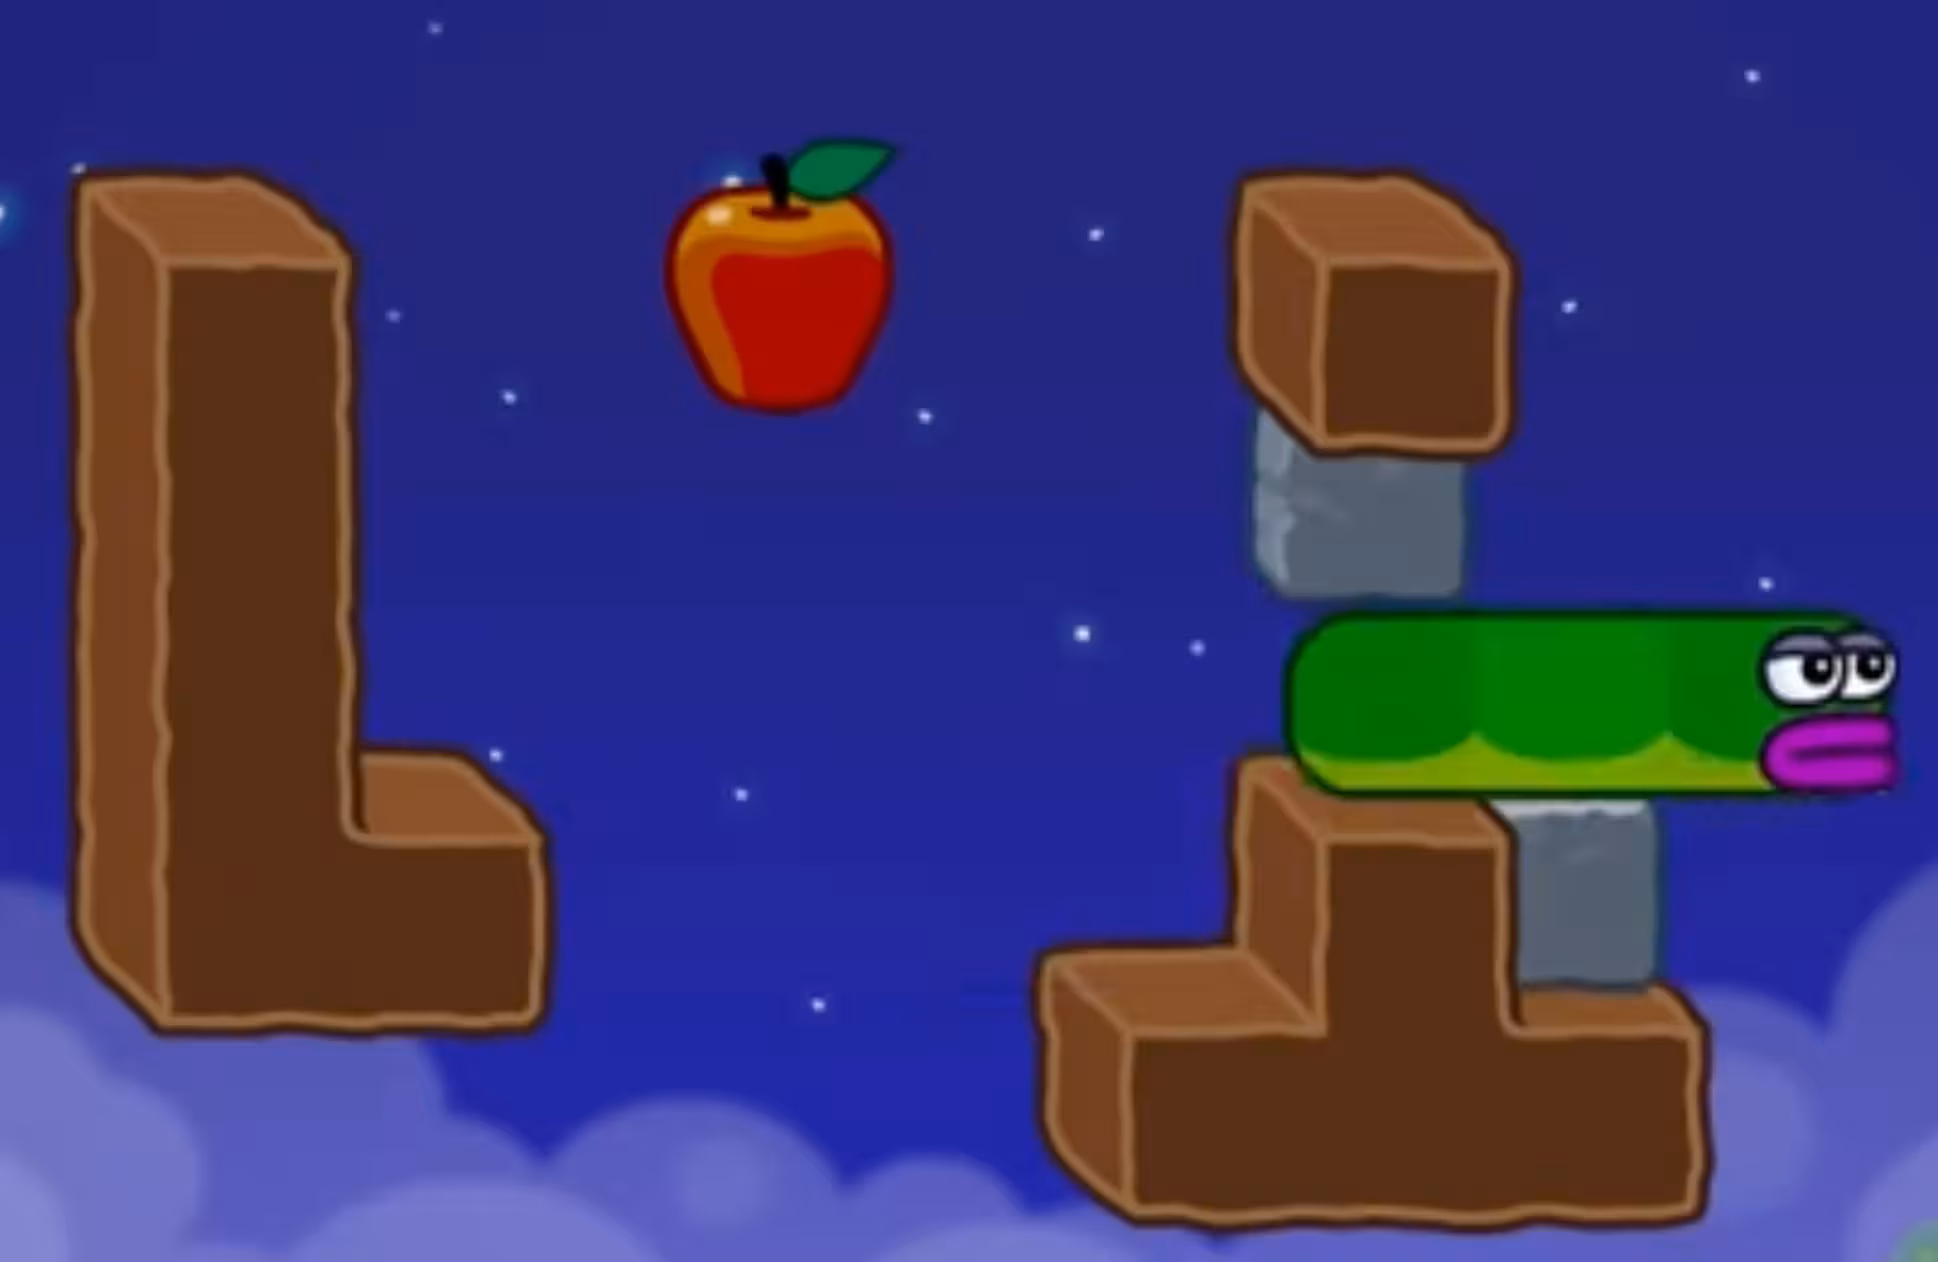
- Return and pass through the stone block.
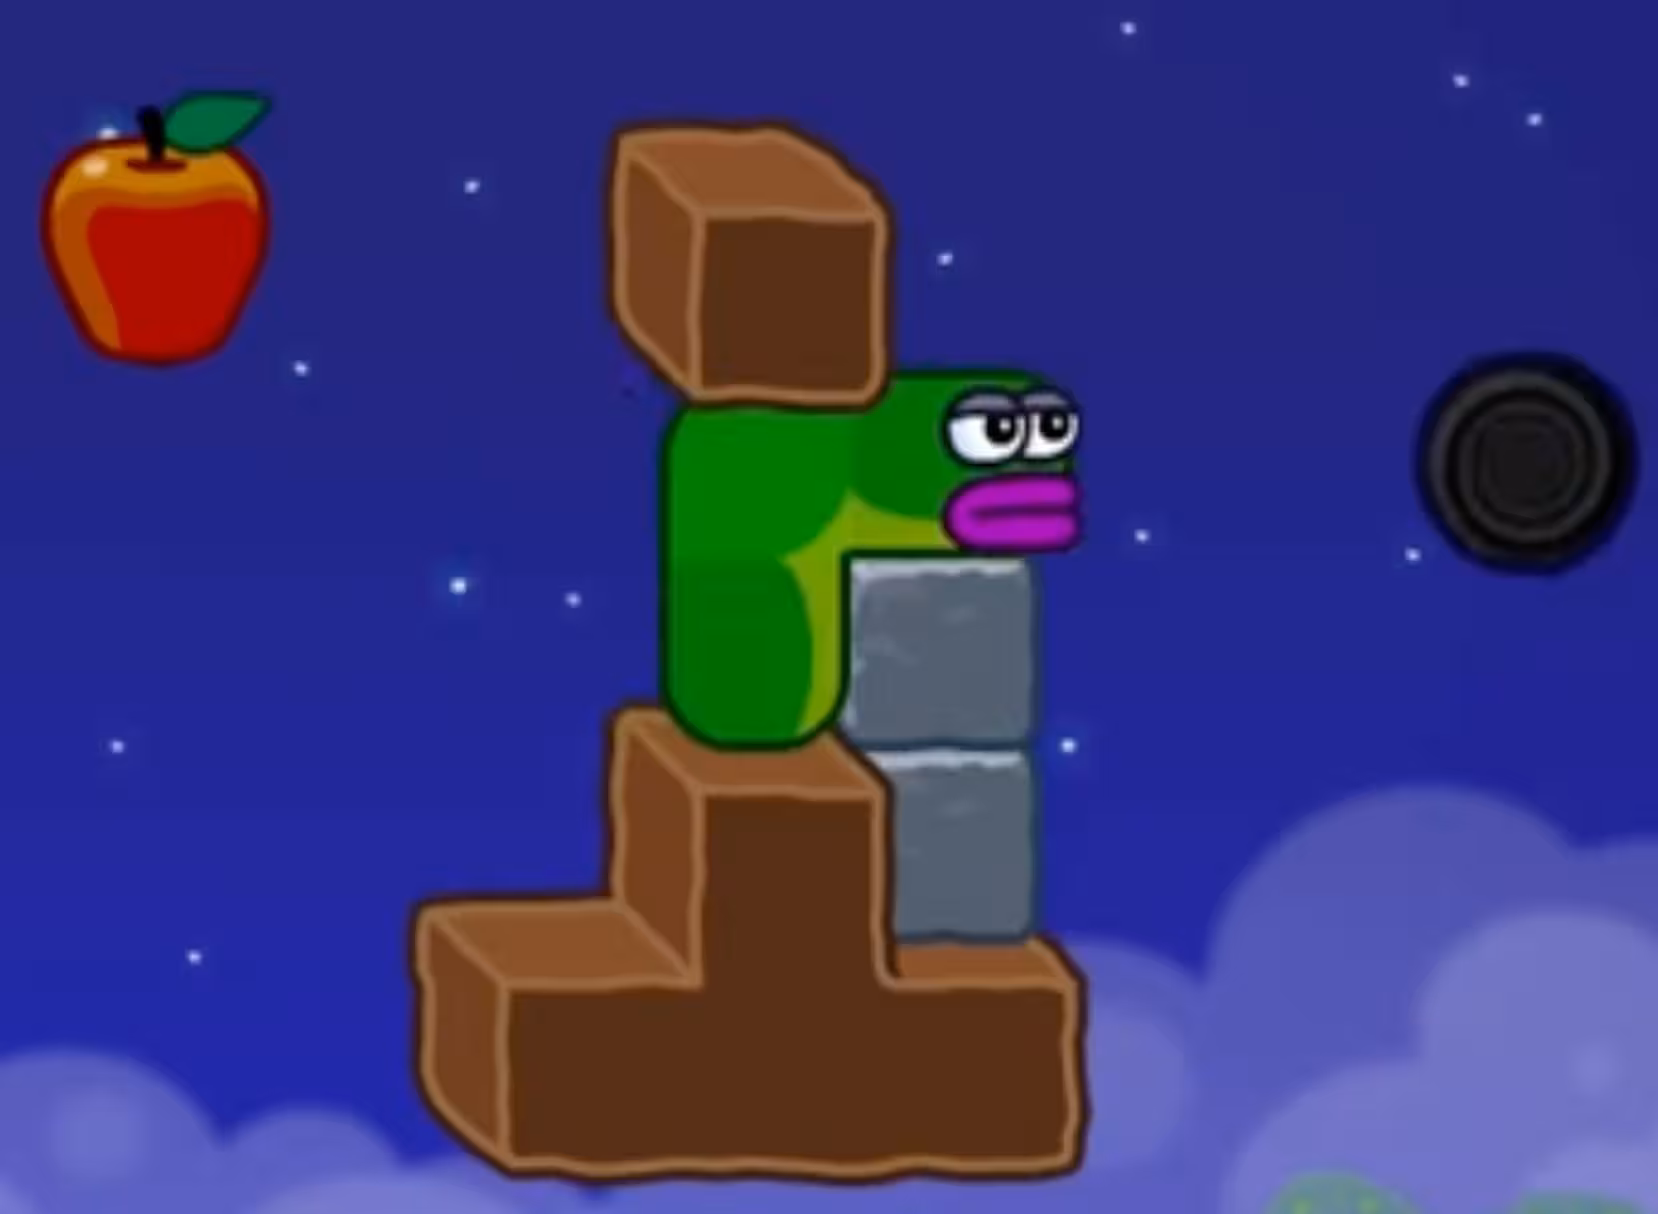
- Push the stone to the right and stack the stones.
- Use the stacked stones to move right and clear the level.
Key Frames
Level 19 Route Summary (Drop, Re-Route, Stack)
This Apple Worm Level 19 walkthrough can be thought of as two parts. Part one (Steps 1–2) is about getting a consistent position using the apple and a natural drop. Part two (Steps 3–6) is about moving stones into a stacked shape so you have a clean rightward path to finish.
The Critical Move in Level 19 (Step 5)
Step 5—“Push the stone to the right and stack the stones.”—is the make-or-break moment. The goal is not just pushing a stone; it’s getting the stack to match the key frame so Step 6 (“Use the stacked stones to move right”) becomes straightforward. If Step 6 feels blocked, it usually means the Step 5 stack isn’t in the intended position yet.
Why the Steps Are in This Order
- Step 1 uses the apple to move onto the right-side earth block, setting up the approach for the next move.
- Step 2 (“move up one step and let it drop naturally”) gives you a predictable landing without extra adjustments.
- Step 3 pushes the lower stone block to reach the target position shown in the frames.
- Step 4 forces a reset of your route: you return and pass through the stone block before you commit to stacking.
- Steps 5–6 turn the stones into a stacked platform and then use that platform to move right and clear the level.
Common Mistakes (and Quick Fixes)
- Your landing doesn’t match Step 2: redo Step 2 exactly—move up one step, then let the worm drop naturally—before touching any stones.
- Step 3 feels like you can’t reach the target position: confirm you are pushing the lower stone block (Step 3) and compare against the Step 3 key frame.
- You can’t do Step 4 after moving stones: if “return and pass through the stone block” is no longer possible, back up and complete Step 4 before attempting the stack in Step 5.
- The stack in Step 5 looks off: keep pushing the stone to the right until the stacked shape matches the Step 5 image, then proceed with Step 6.
Reset Checkpoints (Save Time)
- After Step 2: if your position is wrong, fixing it here is faster than correcting it after you start moving stones.
- After Step 4: treat this as the final setup checkpoint; if anything looks different from the frames, adjust before Step 5.
Troubleshooting (Stuck?)
- My landing is different (Step 2): redo Step 2 and make sure you “move up one step” before letting the worm drop naturally.
- I can’t reach the target position (Step 3): confirm you’re pushing the lower stone block, then compare with the Step 3 frame.
- I can’t do the return move (Step 4): you likely skipped Step 4 until after changing stone positions; reset to a state where Step 4 is possible, then continue.
- The stacked stones don’t help (Step 6): revisit Step 5 and push to the right until the stack matches the key frame.
- Video not playing: Open direct link: Watch on YouTube