Apple Worm Level 17 Walkthrough
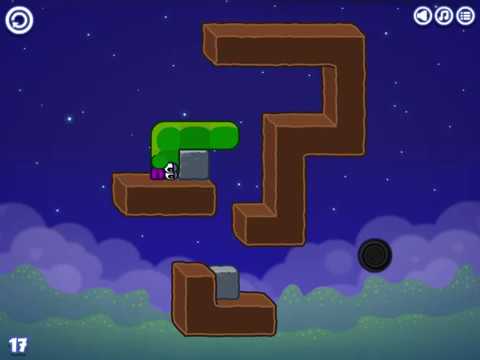
Apple Worm Level 17 is a “stone drop + stack” level. Your goal is to push the stone to the edge, climb using the apple, then use two controlled drops to stack stones and open a clean finish to the exit. The key is to keep matching the frames after each drop, instead of improvising.
Video Walkthrough (Click to Play)
Need another level? Apple Worm All Levels Guide
Quick Navigation (Video ↔ Steps)
For Apple Worm Level 17, use Step 4 and Step 6 as the two “must-match” checkpoints. Step 4 is where you move the right stone left two steps to trigger a drop onto the lower dirt block. Step 6 is where a one-step push triggers a second drop that stacks the stones.
When you watch the video, pause at Step 2 (stone at the right dirt edge), Step 4 (after the two-step left move and the drop), and Step 6 (after the stack). If your screen looks different at any checkpoint, go back to the previous step and rebuild the same position.
Step-by-Step Guide
Follow the quick steps for the route, then use the key frames to verify each drop and the final stack before you continue.
Quick Steps
- Move the worm to the left side of the stone block to set up a right push.
- Push the stone block to the right until it reaches the right edge of the dirt block.
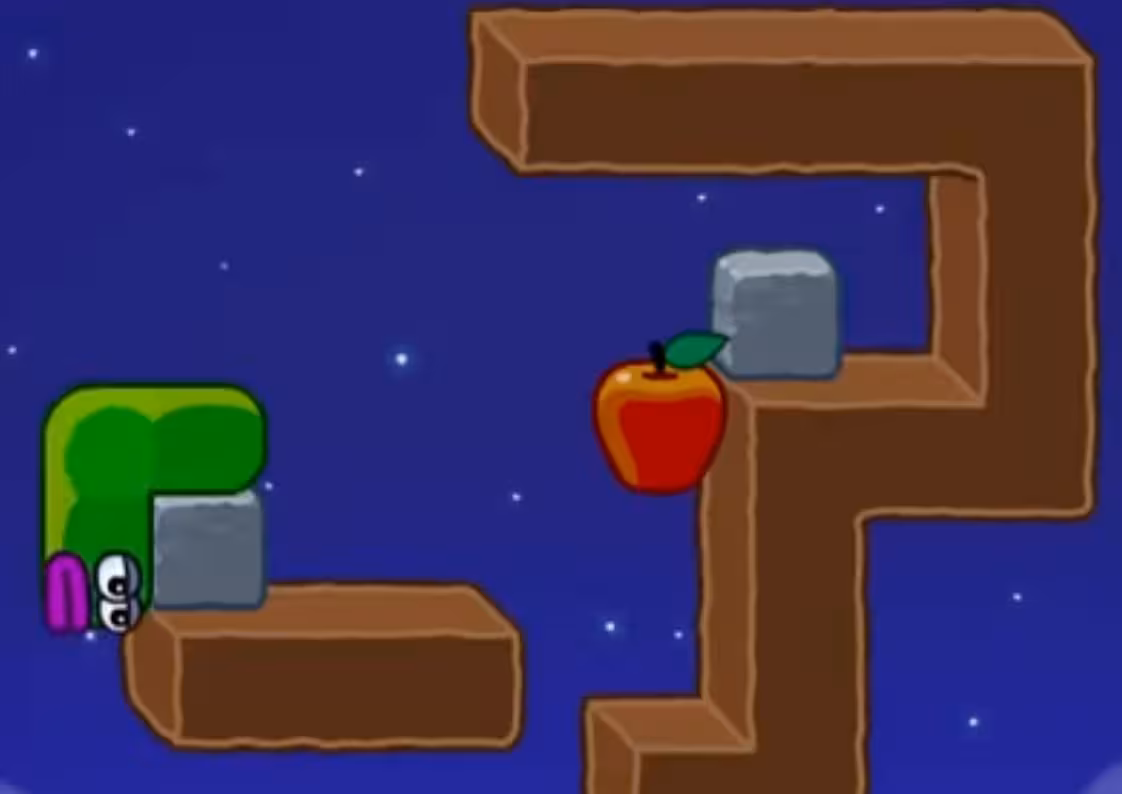
- Use the stone block and the apple to climb up to the right-side stone block.
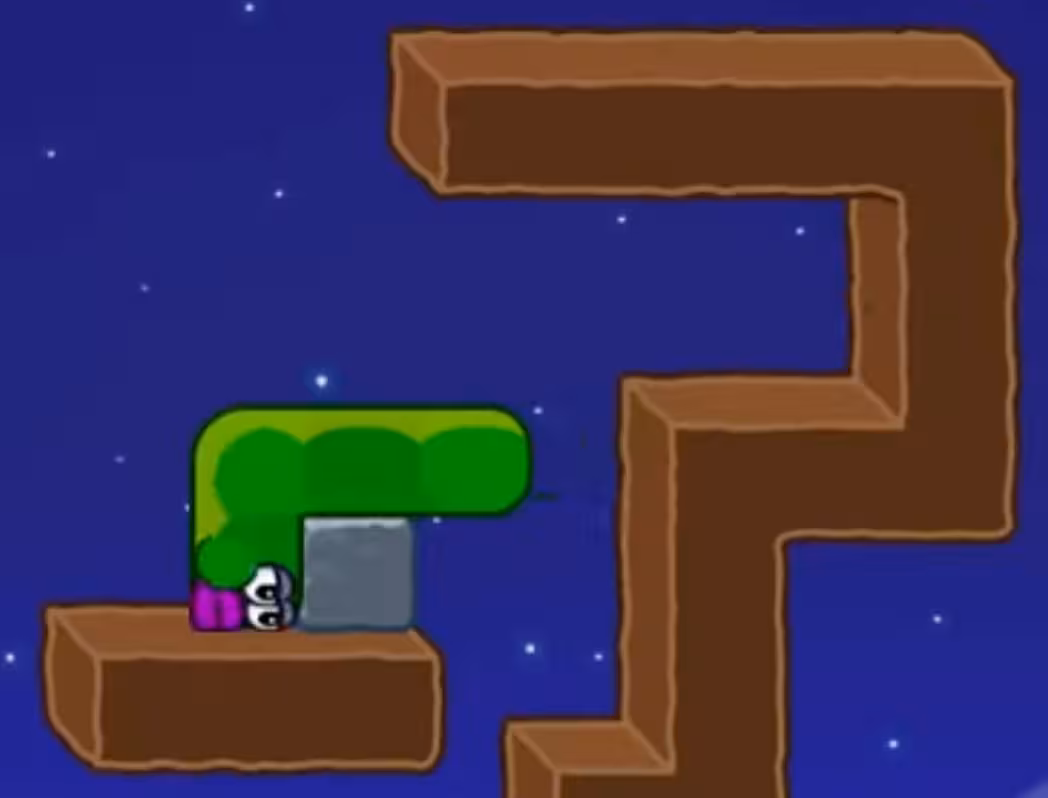
- Push the right-side stone block left two steps so it drops down onto the lower dirt block.
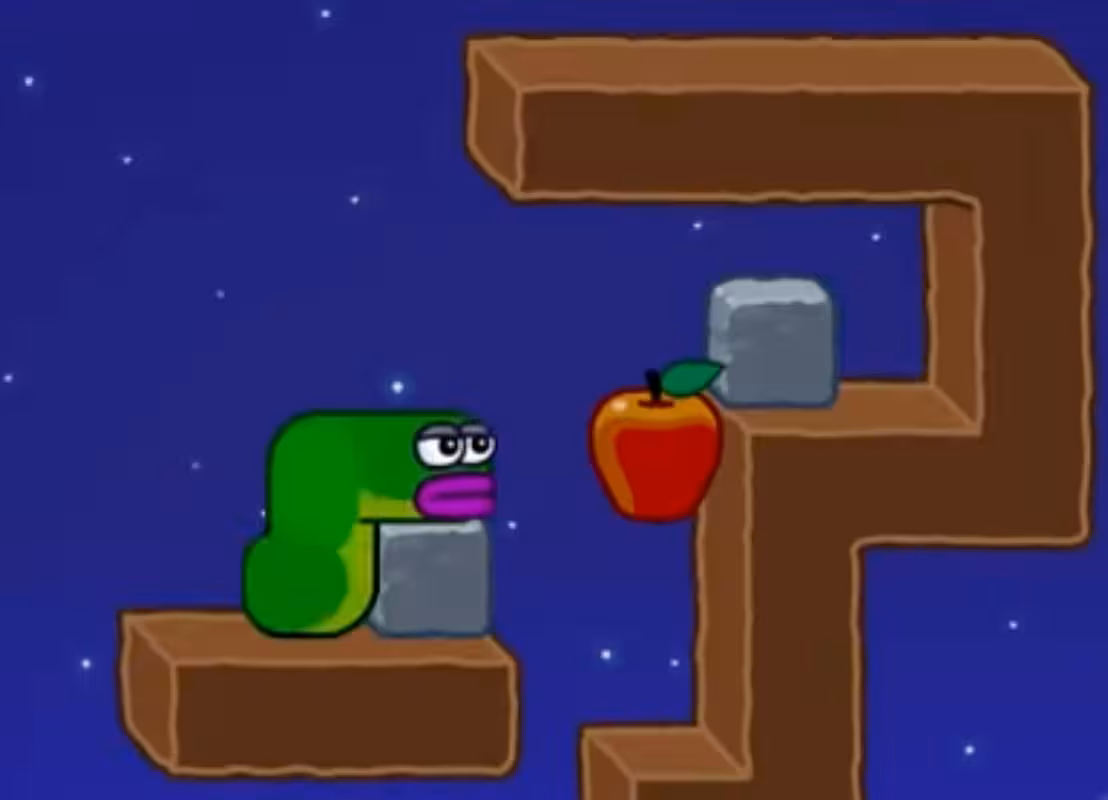
- Move down one step to eat the apple, then move left to the left side of the stone block (match the key frame).
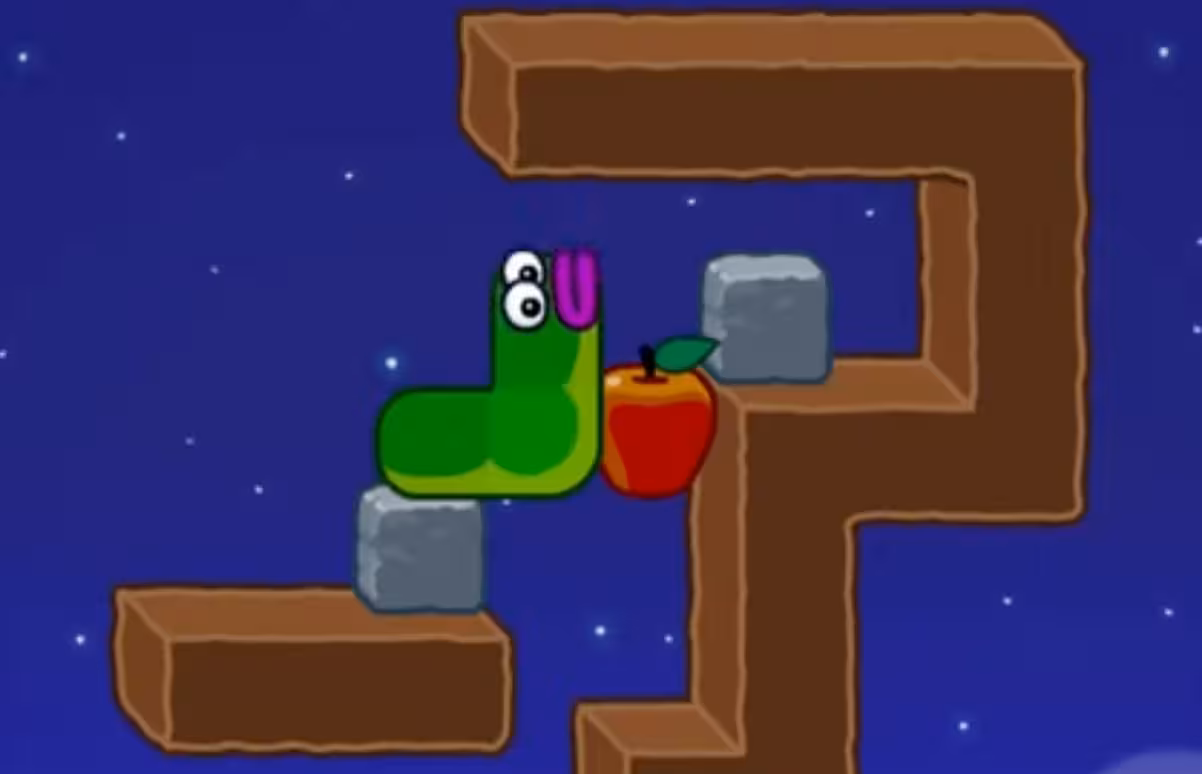
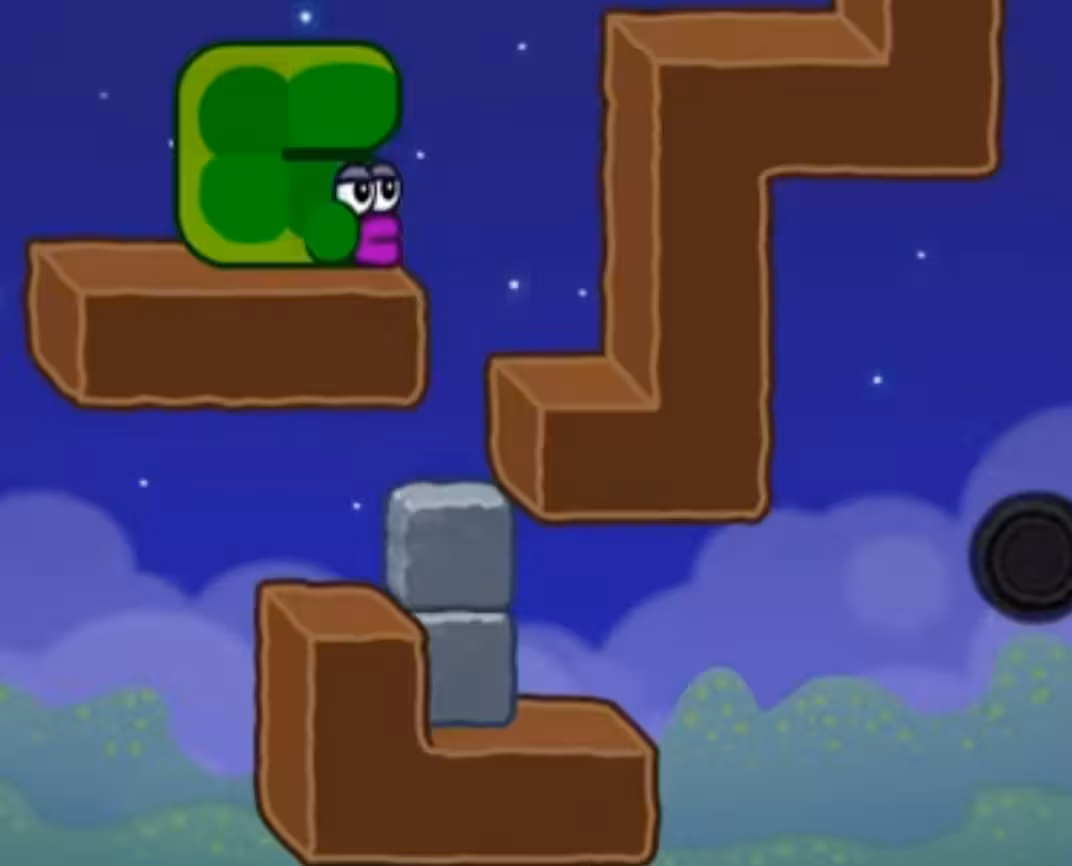
- Push the stone block right one step; it drops and stacks on the stone block below.
- Move to the left side of the stone block again.
- Push the stone block right one step; it drops, then move right to clear the level.
Key Frames


Level 17 Gameplan (Edge Push → Two Drops → Stack and Finish)
This Apple Worm Level 17 walkthrough is built around two controlled drops. First, you set the left stone block at the right edge (Step 2) so you can climb with the apple (Step 3). Next, you reposition the right-side stone block with a two-step left move to make it drop onto the lower dirt block (Step 4). Finally, you use a one-step push to create a stack (Step 6), then repeat the left-side setup for the last drop and exit (Steps 7–8).
The Critical Move in Level 17 (Step 6)
Step 6 is the key stack: “Push the stone block right one step; it drops and stacks on the stone block below.” If the stack does not match the key frame, the final push-and-drop in Step 8 usually won’t line up with the finish. Treat Step 6 as a hard checkpoint and fix it before you continue.
Why the Order Works
- Step 1 sets your pushing angle by placing the worm on the left side of the stone block.
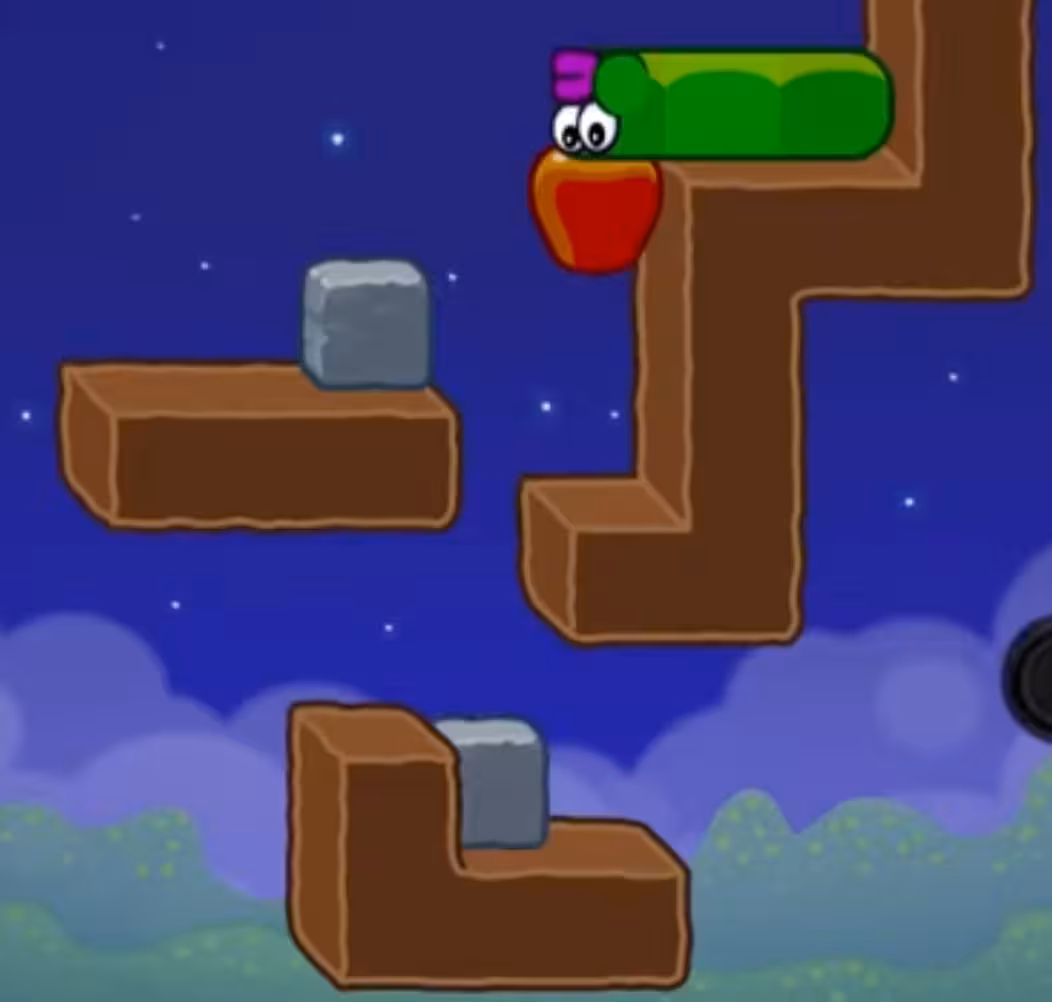
- Step 2 positions the stone block at the right dirt edge so the climb route in Step 3 is consistent.
- Step 3 uses the stone block and the apple to reach the right-side stone block without extra detours.
- Step 4 creates the first controlled drop by pushing the right-side stone block left two steps.
- Step 5 locks in the “pre-stack” position: down one step for the apple, then left to match the frame.
- Step 6 creates the stack with a one-step push, turning two blocks into a usable shape.
- Steps 7–8 repeat the left-side setup and the one-step push to trigger the final drop and finish to the right.
Common Level 17 Mistakes (and Fast Fixes)
- The stone won’t move in Step 1: make sure you are on the left side of the stone block before pushing right.
- Step 2 doesn’t match the frame: keep pushing right until the stone block reaches the right edge of the dirt block, then stop.
- The drop in Step 4 doesn’t happen: Step 4 must be exactly “left two steps” from the right-side stone block position; re-check the frame and repeat.
- The stack in Step 6 looks wrong: return to the Step 5 key frame (down one to eat the apple, then left of the stone) and redo the one-step push.
Reset Checkpoints (Save Time)
- After Step 2: if the climb in Step 3 feels off, reset your position and rebuild Step 2 before climbing.
- After Step 4: if the stone did not drop as shown, redo the two-step left move before you eat the apple in Step 5.
- After Step 6: treat the stacked shape as your last major checkpoint; fix it before attempting Steps 7–8.
Troubleshooting (Stuck?)
- I can’t start the push (Step 1): reposition to the left side of the stone block first, then push right.
- My stone isn’t at the dirt edge (Step 2): push right until it reaches the right edge of the dirt block, then compare with the key frame.
- Step 4 doesn’t drop the stone: repeat Step 4 as exactly two left moves on the right-side stone block until it falls onto the lower dirt block.
- Step 6 won’t stack: recreate the Step 5 position (down one for the apple, then left of the stone block), then push right one step again.
- Final drop doesn’t line up (Step 8): go back to Step 7 (left side of the stone block) and redo the one-step push.
- Video not playing: Open direct link: Watch on YouTube