Apple Worm Level 16 Walkthrough
Apple Worm Level 16 is a “block-control” level: you use two stone blocks in three roles—ladder, bridge, then final climb—to get the apple and line up with the exit. Use the video if you want the full route, then use the key frames to lock in the exact positions that matter.
Video Walkthrough (Click to Play)
More help: Apple Worm All Levels Guide
Quick Navigation (Video ↔ Steps)
For Apple Worm Level 16, the fastest way to compare video and steps is to treat Step 4 as your “must-match” checkpoint: the bridge stone needs to be seated in the dirt pit exactly like the key frame before you try to reach the apple.
When you’re watching the video, pause on the moments that correspond to Step 2 (stones stacked), Step 4 (bridge placed), and Step 6 (setup position before the final push). If your screen doesn’t match those frames, back up one step and fix the position before continuing.
Step-by-Step Guide
Use the quick list for the route, then compare your screen to the key frames to confirm you’re pushing the right block in the right direction.
Quick Steps
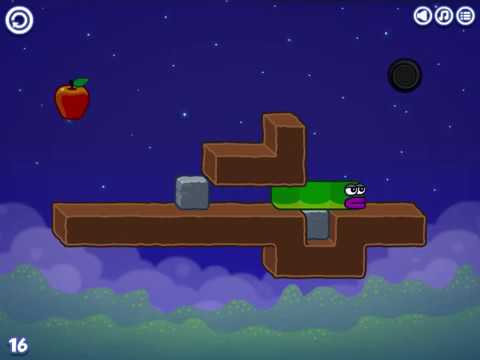
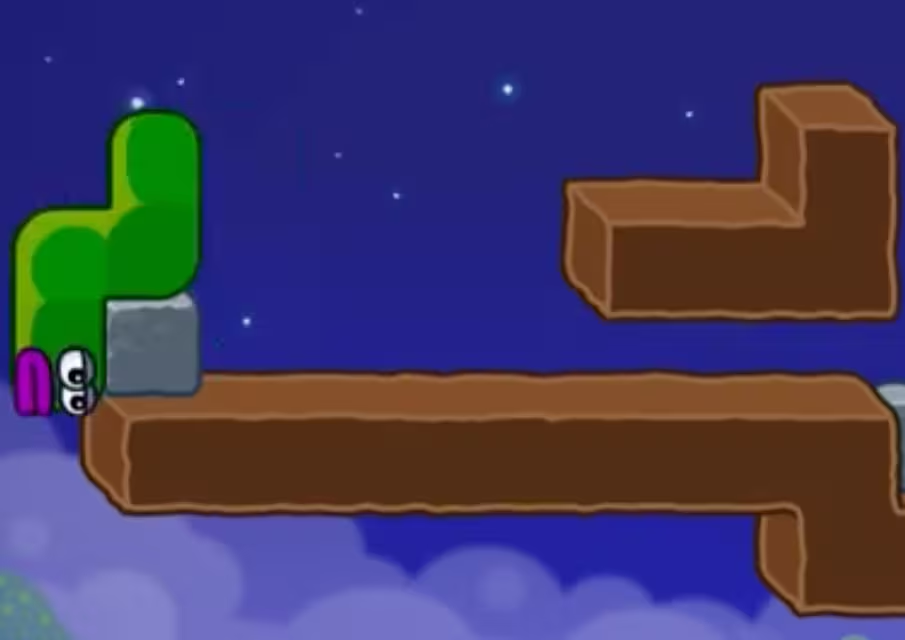
- Use the stone block to climb onto the upper dirt platform.
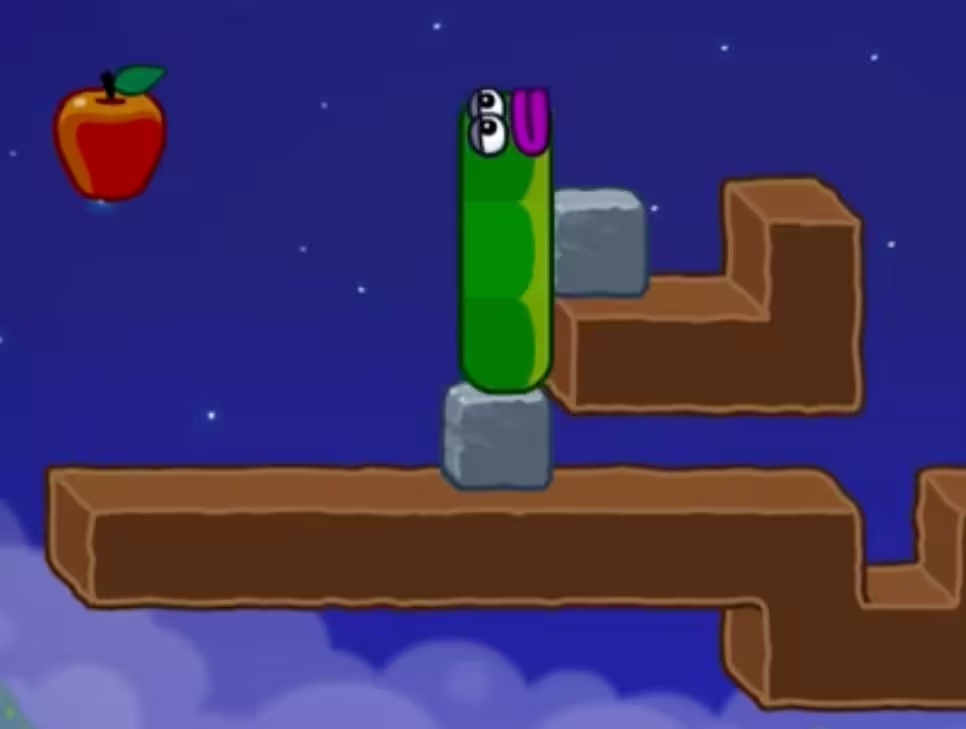
- Push the upper stone block left to stack the blocks.
- Push the lower stone block to the right.
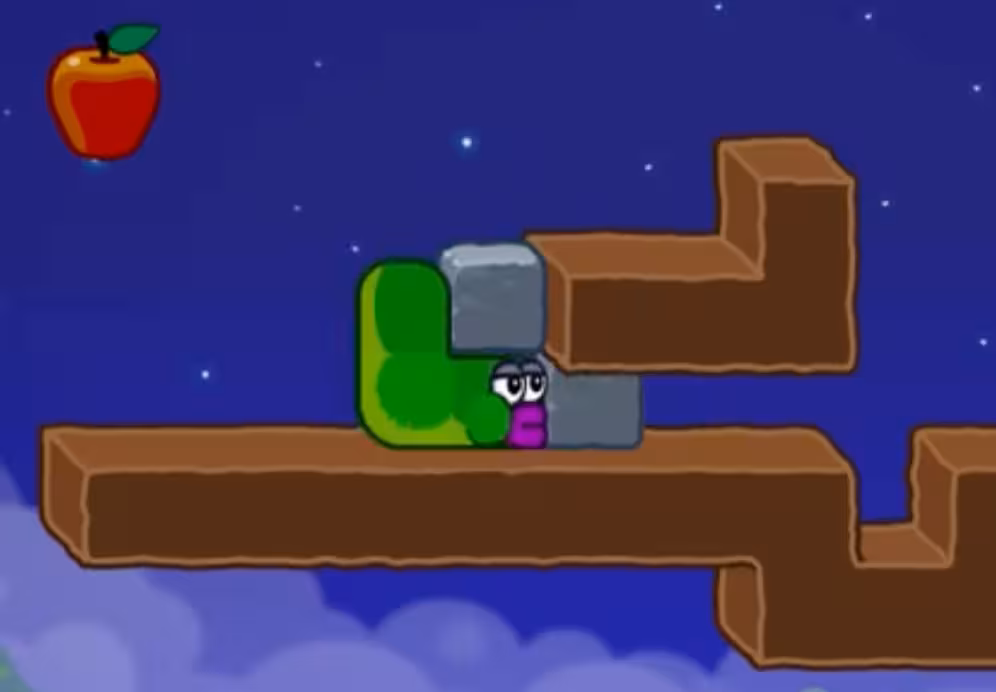
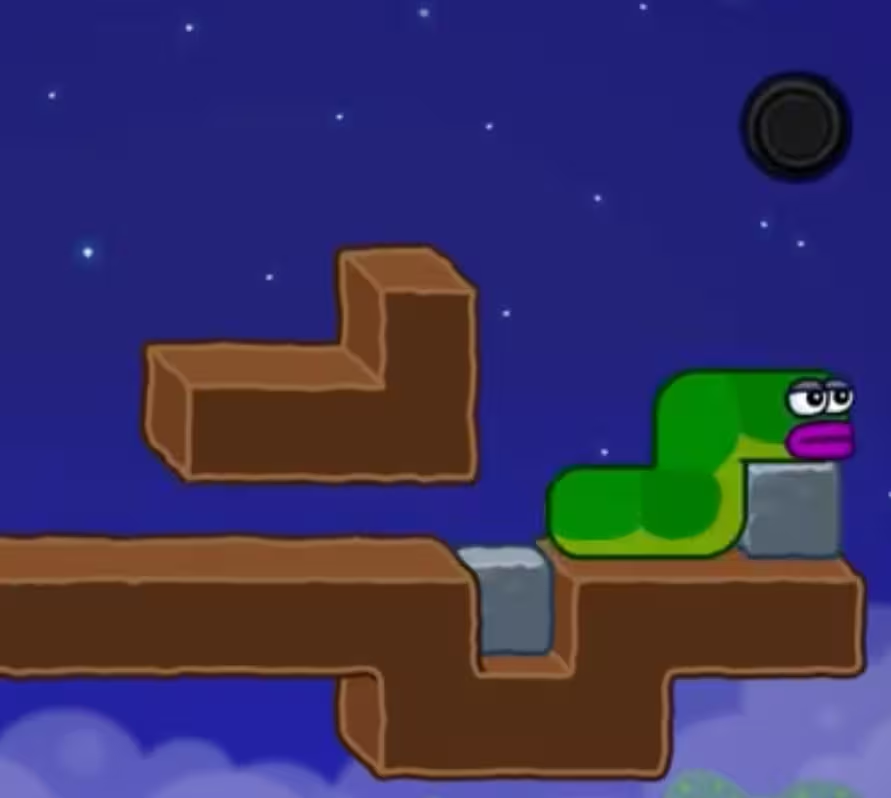
- Fit that block into the dirt pit to create a bridge.
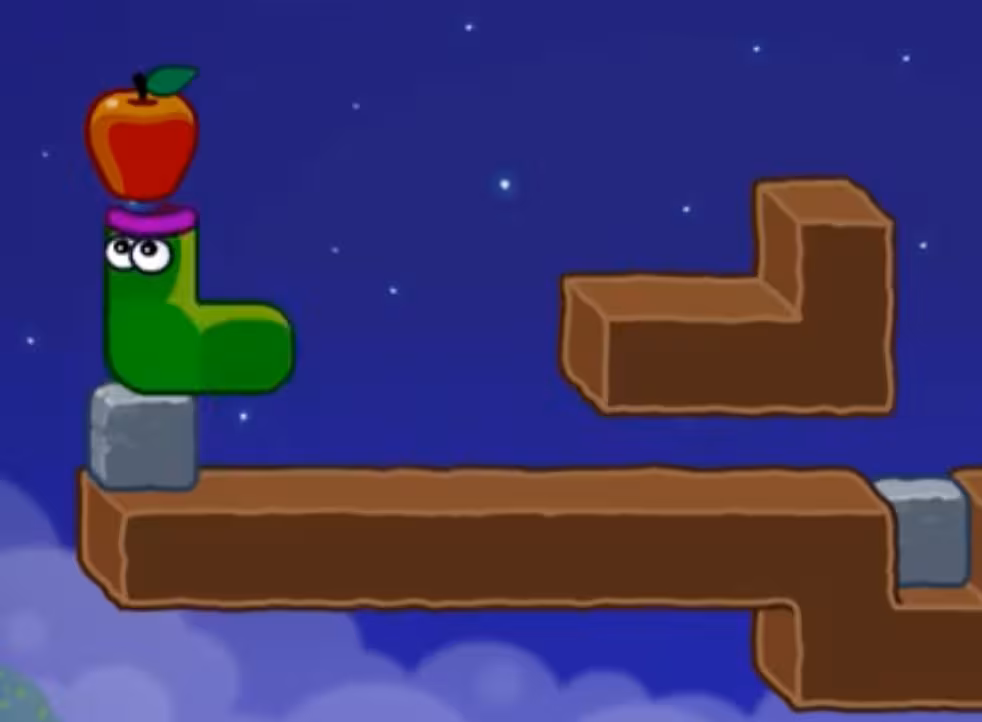
- Move the left block, then use the stacked blocks to reach and eat the apple.
- Adjust your position so you can push the block to the right.
- Push the block right until it lines up with the exit, then climb up to clear the level.
Key Frames


Level 16 Gameplan (Stack → Bridge → Align)
This Apple Worm Level 16 walkthrough is easiest when you treat the steps as three phases. First, you create height (Steps 1–2). Next, you create a reliable crossing (Steps 3–4). Finally, you use a clean setup position to push and climb into the exit (Steps 6–7). If you do the right moves in the wrong order, the later frames won’t match and it will feel like the level “randomly” stopped working.
The Critical Move in Level 16 (Step 4)
Step 4 is the turning point: “Fit that block into the dirt pit to create a bridge.” The stone you pushed right in Step 3 is not just a bridge—it is the piece that preserves your path so you can still use the stacked blocks later. If your bridge stone is not seated the way the key frame shows, the apple reach in Step 5 usually becomes awkward, and the final alignment in Step 7 tends to miss.
Why the Sequence Works
- Step 1 gets you onto the upper dirt platform so you can interact with the upper stone block.
- Step 2 stacks the stones, turning two separate blocks into one taller climb.
- Step 3 prepares the “bridge block” without undoing the stack you need as a ladder.
- Step 5 uses the stack as a height boost right after you move the left block, so you can reach and eat the apple efficiently.
- Steps 6–7 are pure alignment: you position yourself to push the stone until it lines up with the exit, then climb straight up.
Common Level 16 Mistakes (and Fast Fixes)
- The stones don’t stack after Step 2: go back to the Step 1 posture on the upper dirt platform and repeat the left push until the blocks match the Step 2 frame.
- The bridge doesn’t look like Step 4: redo Step 3 with a clean right push, then re-seat the block into the dirt pit before you continue.
- You can’t reach the apple in Step 5: make sure you moved the left block first, then use the stacked blocks exactly as the Step 5 caption describes.
- The final push feels impossible in Step 7: return to the Step 6 setup position, then push right until the stone clearly lines up with the exit before climbing.
Reset Checkpoints (Save Time)
- Before Step 5: you can still re-check the bridge placement from Step 4 without restarting the entire level.
- After Step 5: treat the Step 6 frame as your setup checkpoint—if your position doesn’t match, back up and correct it before doing the final push.
Troubleshooting (Stuck?)
- The blocks won’t stack (Step 2): reset to the Step 1 position on the upper dirt platform and push the upper stone block left again until it matches the frame.
- The bridge placement fails (Step 4): repeat Step 3, then fit the stone into the dirt pit the way the Step 4 image shows before moving on.
- Can’t reach the apple (Step 5): confirm you moved the left block first, then climb using the stacked blocks as described.
- Can’t start the final push (Step 6): re-create the Step 6 setup position, then try pushing to the right from there.
- Video not playing: Open direct link: Watch on YouTube